


A Teach Pendant is a handheld control device used to program, operate, and troubleshoot industrial robots. It serves as the primary interface between the operator and the robot, allowing precise movement control, task teaching, and system monitoring during setup, maintenance, and daily operation.
In most industrial environments, the teach pendant is not just a programming tool—it is a critical operational component. When a teach pendant or its cable fails, robot setup, recovery, and even basic troubleshooting can become impossible, leading to unexpected downtime.
This article explains what a teach pendant is, how it works, its key functions, common problems, and when replacement should be considered, especially from a maintenance and spare-parts perspective.

A teach pendant communicates directly with the robot controller and allows operators to interact with the robot in real time. It is typically used in manual or teaching mode, where safety and precision are critical.
Most teach pendants support the following functions:
Manual Jogging
Operators can move robot axes or TCP positions incrementally for setup and calibration.
Program Teaching and Editing
Positions, paths, and sequences can be recorded directly through the pendant interface.
System Monitoring and Diagnostics
Status messages, alarms, and error codes are displayed on the pendant screen.
Safety Control
Features such as emergency stop buttons and enable switches ensure safe operation during teaching.
Because of this direct connection to both safety and motion control, a malfunctioning teach pendant can immediately limit a robot cell’s usability.
Understanding the internal and external modules of a teach pendant helps users maximize its capabilities and troubleshoot issues efficiently. Below are its core components:
Touchscreen/LCD Panel: Ranges from 6.5" (ABB) to 8.4" (KUKA), displaying 3D models, safety zones, and real-time diagnostics.
Backlight System: Ensures visibility in low-light industrial settings.
Jog Keys & 6D Mouse: Manipulate robot axes (X/Y/Z) and adjust orientation (roll/pitch/yaw).
Mode Selector Switch: Toggles between Teach, Auto, and Manual modes.
Physical Buttons: Dedicated keys for functions like "Start," "Reset," or "Speed Override."
Now let’s have a close look at some Teach pendant Brand’s as under.
Choosing thebest industrial robot teach pendants depends on your robot brand and application needs. Below is a detailed comparison:
Best For: High-precision tasks in automotive manufacturing.
Key Features: 6.5" touchscreen, 30m control cables, RW5.07+ software.
Best For: Multi-tasking workflows with 3D graphics and HTML customization.
Key Features: USB ports, 4D modeling, visual jog functions.
Best For: Harsh environments requiring rugged design (IP65 rated).
Key Features: 8.4" screen, hot-pluggable interface, 6D mouse.
Best For: Welding and material handling with touchscreen troubleshooting.
Key Features: Slim ergonomic design, real-time error tracking.
ABB also known as Asea Brown Boveri is a Swedish-Swiss Multinational Automation company.
ABB Teach pendant new model product ID is 3HAC028357-001 and its size or dimensions are 38*34*22. The software required for its seamless operation & use is version RW5.07.02 or higher version. ABB old teach pendent ID is 3HAC023195-001 replaced by the new model above.
ABB teach pendant has a 6.5 inch LCD display with screen touch functions. It also has a new plastic case shell cover and comes with 10/30 meters control cable for connectivity with a robot. Although ABB is the original manufacturer of the ABB Teach pendant but they are manufactured also in China.
The ABB Teach pendant is& stocked in 2 warehouses globally. One warehouse is in Shanghai, China the other warehouse is in Menden, Germany. It has a Net or Gross weight of 3.06 Kg.

FANUC Corporation, Japan is a Japanese leading robot manufacturer. It also manufactures robot spare parts and associated hardware.
The Fanuc Teach Pendantis same like a teach pendent in size working and is a combination of energy efficiency speed and at the same time offering user-friendly operation. It has a convenient and comfortable design a large color touch display. It incorporates multi-tasking functions like 3D graphics display.
You can create your own HTML screens using Fanuc i-pendent huge functions access. It’s easy to operate using built-in smart functions. I-pendent has a graphical editing function. It offers two additional axis on the display screen due to its newest jog keys. It has multi-task display for extra information.
This Fanuc robot teach pendant also includes USB port connection for mouse or memory stick usage. It also generates node maps on the colored screen for easy understanding of program points motion paths thus making easy understanding of a robot working paths.
Its 3D Graphic’s display helps in easy setup of dual check safety configuration. It has an advanced 4D modeling function for on screen display of robot paths, safety zones, Frame setup tools settings.
The Fanuc iPendant has a visual jog function which uses a 3D model Technique which quickly confirms distance direction of jogging or inching (Jogging means quick repeated actions of a circuit/control system attached to a robot for a specific work completion) according to NEMA-National Electrical Manufacturers Association, U.S.A

KUKAis basically a German manufacturer;of industrial robots systems related to industrial automation. A Chinese company Midea Group owns about 95% shares of KUKA.
It must be known to us all that Germany is the world’s biggest automobile Manufacturer in the world.So likewise Germany is also one of the country in the world that manufactures robots, industrial robots e.t.c,.
With Kuka smartpad you can have dynamic operation in the most demanding manufacturing requirements. The Kuka smartpad is designed to do the most complex operations easily in the most harsh conditions. It can be used anywhere in the most complicated environments and it can be easily used by even the inexperienced users.
The Kuka smartpad has an ergonomic panel for robot control it also has a mesmerizing touch display. The Kuka smartpad shows only the most related operations options in real-time on its highly Dynamic touch display. Even the inexperienced users Full professionals both alike can use the Kuka Smartpad due to its easy operations guidance.
The Kuka robots operating on different programming languages can be easily operated in the desired programming language at the time. Due to the Hot Pluggable capability interface the Kuka smartpad can connected disconnected anywhere, anytime and anyway. The Kuka smartpad has a 6D mouse for the 3 or 6 degrees reorientation of the robot.
It has an 8.4 inch touch screen for easy quick operations.
It has 2 USB ports for application programs loading saving inside the Kuka smartpad. The Kuka smartpad can rigorously control upto eight axes with its different jog keys. So at the end we easily see that that the Kuka smartpad is a Small industrial wizard with endless uses applications.

The most important component of any industrial robot is a Teach Pendant. In the same manner Yaskawa Teach Pendant’s play a crucial pivotal role in the control, programming and testing of any Yaskawa Manufacturing industrial robot.
Different programming commands can be used via the entry mechanism of any pendant, either through a touchscreen or a keypad. For the welding applications different commands can be made input through the Yaskawa Teach pendent. Apart from programming Yaskawa teach pendants can also be at their best usage for technically adjusting troubleshooting in a robot.
Different applications changes adjustments can be also done quickly easily. The robot user can also track the history of past applications. During an emergency a robot can be stopped through Yaskawa Teach pendant.
A Yaskawa Teach Pendant is the Newest teach pendant incorporating a Touchscreen. The Yaskawa Teach pendant is only workable with select Yaskawa robots fully controlled by their specific controller.
This Teach pendant is limited to the applications which are programmed into it by a professional user. The main Components of a Yaskawa Teach Pendant include a large touchscreen for display, a stop button. An enabling switch and 3 mode key switch are also inside the Yaskawa Teach pendent.
The Yaskawa Teach pendants offer user friendly operations thus making an application simple apart from programming of a robot. The Yaskawa Teach pendant has a slim design for easy use by the robot operator.

Learning how to program a robot teach pendant is critical for optimizing robotic workflows. Here’s a simplified guide:
Activate the robot controller’s teach mode via the pendant’s mode selector switch.
Use the 6D mouse or jog keys to manually position the robot arm.
Save key positions (e.g., pick-up/drop points) into the program memory.
Run the program at low speed to ensure accuracy and safety.
Teach pendants are used frequently, often in demanding industrial conditions. Over time, several issues can occur.
Unresponsive buttons or touchscreen
Intermittent communication with the controller
Sudden emergency stop triggers
Display flickering or failure
Random faults during movement or teaching
In many cases, the pendant itself is not the root cause. Cables and connectors are often responsible, which leads to misdiagnosis and unnecessary replacement of complete units.
One of the most common maintenance questions is whether a problem originates from the teach pendant unit or the teach pendant cable.
Faults appear only when the cable is moved or bent
Intermittent signal loss
Emergency stop activates without pressing the button
System works normally after reconnecting the cable
Teach pendant cables experience constant bending, twisting, and mechanical stress, making them one of the highest-wear components in robot operation.
Correctly identifying cable-related issues can significantly reduce maintenance costs and downtime.
Unlike the pendant housing, cables are exposed to:
Continuous motion during teaching
Tight bending radii
Oil, dust, and industrial contaminants
Repeated connection and disconnection
As a result, cables often fail years before the pendant electronics do. This is why many maintenance teams choose to replace the cable first before investing in a full pendant replacement.
There is no fixed lifespan, but typical observations include:
Teach pendant units: often last many years if not physically damaged
Teach pendant cables: may require replacement every few years, depending on usage intensity
Factors that shorten lifespan include:
High-cycle production cells
Frequent teaching or manual operation
Poor cable routing or strain relief
Understanding these factors helps maintenance teams plan preventive replacement instead of reacting to failures.
Replacement should be considered when:
Internal electronics fail repeatedly
Display or control inputs no longer respond reliably
Safety functions cannot be trusted
Repair costs approach replacement costs
In contrast, minor issues or intermittent faults are often resolved by replacing cables or connectors, not the entire pendant.
Making the right repair-vs-replace decision is critical for controlling maintenance budgets.
From a maintenance perspective, the following items are commonly kept as spares:
Teach pendant cables
Emergency stop buttons
Keypads or control switches
Compatible replacement pendants
Keeping these parts in stock reduces response time during failures and helps prevent prolonged downtime.
Many facilities also choose compatible or replacement options for discontinued or long-lead-time models.
To support daily operation and maintenance, commonly sourced items include:
Complete teach pendant units
Teach pendant cables
Compatible or replacement pendants
Related connectors and accessories
Selecting the right combination of original and compatible parts depends on application criticality, availability, and long-term maintenance strategy.
A teach pendant is far more than a programming accessory—it is a core operational interface in industrial robotics. Understanding how it works, recognizing common failure modes, and planning proper spare-parts strategies can significantly reduce downtime and maintenance costs.
For facilities running robots daily, proactive management of teach pendant components is essential to maintaining stable and efficient production.
Q1: Can a robot operate without a teach pendant?
In most cases, a teach pendant is required for setup, teaching, and recovery, even if automatic operation is possible without it.
Q2:Is it better to repair or replace a faulty teach pendant?
Cable-related faults are often repaired by replacement. Internal electronic failures usually require full replacement.
Q3: Should maintenance teams keep spare teach pendants?
For critical production cells, keeping at least spare cables—and sometimes a spare pendant—is strongly recommended.
Q4: Are compatible teach pendants reliable?
Compatible options are increasingly used, especially for older or discontinued models, when sourced from reliable suppliers.
Q5: How to Calibrate a Robot Teach Pendant?
A: Calibration steps vary by brand, but generally:
Note: Improper calibration may cause axis drift.
Q6: Why Won’t My Teach Pendant Connect to the Robot?
A: Common causes include:
Q7: Are Teach Pendants Cross-Compatible Between Brands?
A:No. ABB, Fanuc, KUKA, and Yaskawa pendants are designed to work only with their respective robot controllers. Using third-party pendants may void warranties.
Q8: How to Update Teach Pendant Software?
Warning: Always back up programs before updating.
Q9: What’s the Battery Life of a Wireless Teach Pendant?
A: Most wireless models last 8–12 hours per charge. Extend battery life by:
Q10: How to Fix Unresponsive Touchscreen Issues?
A: Try these steps:
Q11: Can I Use a Teach Pendant for Multiple Robots?
A:Yes, but only if:
Q12: What Safety Certifications Do Teach Pendants Have?
A: Reputable brands comply with:
Explore the Full Guide: Industrial Robot Spare Parts → Industrial Robot Teach Pendant Center
Explore foundational knowledge and practical insights to better understand industrial robot systems and components.
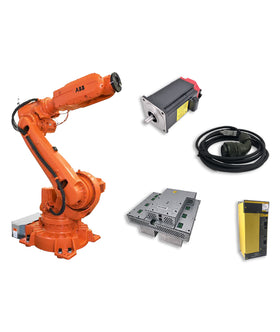
Key components commonly involved in teach pendants issues and replacements.


{"one"=>"Select 2 or 3 items to compare", "other"=>"{{ count }} of 3 items selected"}
Comments
Leave a comment on this topic