


Maintaining your Yaskawa YRC1000 controller is vital for consistent robot performance and operational safety. This guide walks you through replacing three essential components — the CPU unit, Robot I/F board (JANCD-AIF01), and battery — with practical steps and important safety precautions.
Before opening the YRC1000 control cabinet, always disconnect the main power supply to prevent electric shock.
Allow at least 5 minutes after shutting off power before touching internal components. Confirm that the orange LED indicators on the rectifier and inverter units are completely off — residual voltage may still be present in the capacitors.
Hang “Do Not Power On” warning tags on all relevant panels.
Confirm no one is in the robot’s motion range before power-up.
Perform a low-speed test run after replacing any parts to verify stability.
Avoid touching the regenerative resistor when it’s hot — burns may occur.
Use only Yaskawa-recommended parts to ensure compatibility and prevent fire or malfunction.
Phillips screwdrivers (large, medium, small; medium length ≈ 500 mm)
Slotted screwdrivers (large, medium, small)
Tweezers, pliers, flat-nose pliers
Proper lighting for dark environments
The YRC1000 CPU unit consists of:
Base board (JANCD-ABB01-E / JANCD-ABB02-E)
Robot I/F base board (JANCD-AIF01-E)
CPU base board (JANCD-ACP01-E)
The robot I/F base board connects directly to the CPU base board.

When replacing the circuit board, be sure to cut off the power supply.
Wait 5 minutes after cutting off the power before replacing.
Also, please confirm that the charging light (orange LED) of the rectifier and inverter unit is off.Residual voltage in the capacitor may cause electric shock or injury.
1. When the CPU board is connected to the robot I/F board, please remove the following wires:
①Control communication plug (CN111)
②Control power input plug (CN101)
③LAN1 plug (CN105) for teaching programmer
The following is the plug when adding optional functions. Please remove it when connecting.
2. Remove the 2 screws fixing the CPU base board
3. Take out the substrate
4. Take out the SD card from the removed base board (CN104) and insert the new base board. The SD card plug has two methods: push-in and push-out. You can use your fingers to push in and remove the SD card. Follow the same steps to install a new base board.
5. Remove the 4 screws installed on the robot I/F base plate. Since the robot I/F board is connected by the connector (CNA) and the connector (CN12) of the CPU board, please carefully pull up the robot I/F board and take out the CPU board.
6. Connect and install the connector (CN12) of the new CPU base board and the connector (CNA) of the robot I/F base board. The connection of the base board plug is to align the fixing screw hole of the robot I/F base board with the hexagonal screw hole on the side of the CPU base board, and slowly press in the robot I/F base board. If the plug is pushed in while the position is misaligned, the plug may be damaged. So please confirm the location carefully before connecting.
7. Before installing it on the bracket, please confirm whether the battery wires are protruding. If installed while protruding, malfunctions such as being pressed by the base plate in the bracket or disconnection may occur.
8. Install the new base plate in the original position of the bracket
Insert the base board straight along the upper and lower lines on the left side of the bracket and connect it to the innermost base board plug.
If the circuit board is inserted out of alignment, the circuit board may be damaged. Therefore, if you feel something strange when inserting the circuit board, immediately take out the circuit board to check whether it is damaged, and then insert it again
9. Tighten the 2 fixing screws of the upper and lower CPU base plates
10. Install all the wires removed during operation
The Robot I/F board manages communication between the robot and controller.
Yaskawa offers three variants based on memory capacity:
| Model | Memory Capacity | Description |
|---|---|---|
| JANCD-AIF01-1E | 2 MB | Standard |
| JANCD-AIF01-2E | 4 MB | Optional |
| JANCD-AIF01-3E | 4 MB | Extended communication I/F |
Always disconnect power and confirm LED indicators are off before removing the board.
Program data, parameters, etc. are stored on the robot I/F board. Therefore, data backup must be performed before replacement.
Robot I/F board, memory capacity: 2MB and 4MB
Before replacing the base board, you must confirm the used memory capacity and set memory capacity in maintenance mode.
Standard: JANCD-AIF01-1E (memory capacity: 2MB)
Optional: JANCD-AIF01-2E (memory capacity: 4MB)
JANCD-AIF01-3E (memory capacity: 4MB communication I/F allocation)
Before replacing the substrate, you need to perform the operation in factory mode.
Regarding operations in factory mode, please consult the Robot Division of Yaskawa Electric (China) Co., Ltd.
1. Carry out data backup before operation. Insert the SD card used to save data into the SD card slot of the teaching programmer, start it in maintenance mode, and select "External Storage - Save - CMOS"
For the backup method, please refer to the "YRC1000 User Manual" (R-CT0-A221-C)
2. Please cut off the power supply of the control cabinet after the backup is completed.
3. Disconnect all wires connected to the CPU board and robot I/F board
①Control communication plug (CN111)
②Control power input plug (CN101)
③LAN1 plug (CN105) for teaching programmer
Please remove the following plugs connected when adding optional functions
4. Remove the 2 screws fixing the upper and lower parts of the CPU base plate and take out the base plate
5. Remove the 4 screws installed on the robot I/F base plate. The robot I/F board is connected by the connector (CNA) and the connector (CN12) of the CPU board, so please carefully pull up the robot I/F board and take out the CPU board
6. Confirm that the setting of the rotary switch (S1) of the new robot I/F board is consistent with the setting of the base board before replacement.
7. Connect and install the CPU board connector (CN12) and the new robot I/F board connector (CNA). The connection of the base board plug is to align the fixing screw hole of the robot I/F base board with the hexagonal screw hole on the side of the CPU base board, and slowly press the robot I/F base board in. If the plug is pushed in while misaligned, the plug may be damaged. So please confirm the location carefully before connecting.
8. Before installing it on the bracket, please confirm whether the battery wires are protruding. If installed in a protruding state, malfunctions such as being pressed by the base plate in the bracket and disconnection may occur.
9. Install the base plate in the original position of the bracket. Insert along the line on the left and connect to the baseboard plug inside
10. Tighten the 2 fixing screws on the upper and lower CPU base boards
Install all the wires removed during operation 1.
When the message “Memory battery is exhausted” appears on the teaching pendant, replace the battery within 30 days to avoid data loss.
Important file data (CMOS memory) on the user program is backed up by a supercapacitor, but if "memory battery exhausted" is displayed, please replace the battery with a new one in time (within 30 days).
When replacing the battery, turn on the circuit breaker.
1. Disconnect all the following wires connected to the CPU board and robot I/F board.
①Control communication plug (CN111)
②Control power input plug (CN101)
③LAN1 plug (CN105) for teaching programmer
Please remove the following plugs connected when adding optional functions
2. Remove the 2 screws fixing the upper and lower parts of the CPU base plate
3.Take out the substrate
4. Confirm the position of the battery and battery plug. This section describes a typical example of the first replacement. When the second replacement is performed, one of the connectors (CN114) or (CN115) may not be connected. Please connect the replacement battery to the unconnected plug before proceeding.
5. When the existing battery is connected, connect the new replacement battery to the plug (left side of C115)
6. Remove the existing battery plug (right side of CN114)
7. Remove the existing battery from the battery compartment
8. Install the new battery into the battery box
9. Before installing it on the bracket, please confirm whether the battery wires are protruding. If installed in a protruding state, malfunctions such as being pressed by the base plate in the bracket and disconnection may occur.
10. Install the base plate to the original position of the bracket. Plug in along the wiring on the left and connect to the baseboard socket inside
11. Tighten the two fixing screws on the upper and lower sides of the CPU base plate
12. Install all the wires removed during operation 1
After completing the replacement:
Ensure no tools remain inside the cabinet.
Confirm the cabinet door is fully closed.
Power on and observe any warning lights or abnormal sounds.
Conduct a low-speed test run to confirm system stability.
If any irregularities occur, shut down power immediately and contact a Yaskawa technician.
By following proper replacement steps and safety procedures, you can maintain stable and long-term performance of the Yaskawa YRC1000 control cabinet. Always use official Yaskawa parts and consult authorized support when needed to guarantee system reliability and operator safety.
Explore the Full Guide: Industrial Automation System Cluster → Robot Controller & Control System Cluster
Explore the complete guide for troubleshooting, repair strategies, and component replacement across industrial robot systems.
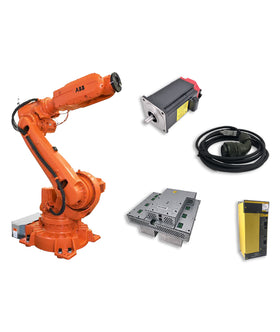
Key components commonly involved in robot controllers issues and replacements.


{"one"=>"比較する2つまたは3つのアイテムを選択します", "other"=>"選択された3つのアイテムの{{ count }}"}
コメントを残す