


OTC welding machines are widely used in various industries for their precision, durability, and advanced welding capabilities. However, like any complex equipment, they can experience faults that impact performance and productivity. Understanding common issues and performing regular maintenance is essential to extend the lifespan of your OTC welding machines and ensure consistent welding quality. This guide outlines frequent faults encountered with OTC welding equipment and provides practical maintenance methods to prevent downtime and costly repairs.

OTC welding machines are arc welding equipment developed and manufactured by the Japanese company Osaka Transformer Company (OTC). Their primary function is to fuse and connect metal components by generating high-temperature arcs, making them widely used across industries such as automotive manufacturing, shipbuilding, steel structure engineering, and pipeline welding.
Key features of OTC welding machines include:
Integration with robotic welding systems (e.g., the VR series), enabling automated production lines with full-process automation like welding path planning and trajectory tracking. This greatly improves production efficiency and consistency.
Use of inverter technology and digital control systems, allowing precise adjustment of welding parameters such as current, voltage, and speed. Many models support preset welding specifications through programmable controls.
Robust design tailored for challenging environments, with some models (like the VRTP-400 series) capable of operating safely in wet, high-altitude, or confined spaces. These machines also include electric shock prevention features, adhering to strict safety standards.
When the equipment experiences a failure where the main power indicator light does not illuminate, and the digital display meter shows no readings and the fan fails to operate after the switch is turned on, immediate action is required.
Possible causes of the failure include a damaged indicator light, abnormal conditions in the distribution box, or issues with the input cables. For example, a broken filament in the indicator light, a tripped switch or loose contacts in the distribution box, and damaged or broken cables can all disrupt the power supply.

To resolve this issue, systematically check the indicator light, components within the distribution box, and the connections and continuity of the input cables. Thorough inspection enables the identification and rectification of the fault, ensuring the equipment resumes normal operation.
When the wire feeder encounters failures such as poor contact or disconnection of the control cable, it will disrupt the stability of wire feeding and reduce production efficiency. The causes of these issues include socket aging and wear, internal disconnection due to damaged cable insulation, loose soldering points or component failures on the circuit board, as well as malfunctions of the current Hall elements.
During troubleshooting, first inspect the socket for looseness or deformation, and replace it promptly if necessary. Then, carefully check the cable insulation and test the continuity of internal wires, replacing damaged cables immediately. Also, examine soldering points and components on the circuit board, and replace faulty circuit boards and current Hall elements to ensure the wire feeder resumes normal operation.
During welding operations, if no gas flows out when pressing the welding torch switch or the gas inspection button, or gas only flows out when pressing the inspection button, it will seriously affect welding quality and operational safety. These failures are mainly related to blocked gas pathways or abnormal control components.
When gas fails to flow out in both scenarios, it may be due to a closed gas valve, insufficient gas pressure in the cylinder, or a malfunction of the solenoid valve on the wire feeder, preventing normal gas delivery. If gas only flows during inspection, it's more likely that the solenoid valve fails to activate when the torch switch is pressed, or there's an issue with the control circuit between the torch and the solenoid valve.

To address this, first confirm that the gas valve is open and use a pressure gauge to check if the gas pressure meets the standard. Replace the cylinder or refill gas if the pressure is insufficient. Also, inspect the power supply and working status of the solenoid valve on the wire feeder. Replace the solenoid valve if it's defective, and check the control circuit when necessary to restore normal gas supply.
During the operation of welding equipment, issues such as gas flowing out when the welding torch switch is pressed but no no-load voltage being present, as well as continuous gas supply without interruption, can seriously affect the normal operation of the equipment and the safety of welding operations.
For the failure of no no-load voltage, it indicates an abnormality in the electrical system of the equipment. It is a prudent initial measure to turn off the power supply and contact the after-sales maintenance service provider, which can prevent potential risks caused by self-operation. Meanwhile, as the core component of the electrical control system, the circuit board may have problems such as damaged components or loose soldering points and needs to be carefully inspected. If faults are detected, the circuit board should be replaced promptly. Regarding the continuous gas supply failure, it may be related to malfunctions in the gas control circuit, solenoid valve, or the failure of the circuit board to properly control gas supply. A thorough inspection and repair of relevant circuits and components are also required. Only by addressing these failures in a timely manner can the welding equipment resume normal operation.
During welding operations, the failure to set the current and voltage directly affects the precise adjustment of welding parameters, severely disrupting normal production. This malfunction is typically caused by abnormalities in the control signal transmission and processing.
The causes of the failure are complex. As the core control component, if components on the circuit board are damaged or soldering points are loose, the control signals cannot be processed properly. Damaged, broken, or poorly - connected cables, as well as loose sockets, may block the transmission of current and voltage setting signals. Malfunctions of the remote control box itself, such as faulty buttons or damaged internal circuits, can also render setting operations ineffective. In addition, improper connection of the circuit board, including loose flat cables and oxidized interfaces, can equally affect the normal operation of the equipment.

To resolve this issue, a comprehensive inspection of related components is required. First, check whether components on the circuit board are damaged and soldering points are firm, and replace the faulty circuit board if necessary. Carefully inspect the continuity of cables and the contact condition of sockets, and repair or replace damaged parts. Test the functions of the remote control box and repair or replace the faulty unit. At the same time, ensure that the circuit board connections are secure and clean oxidized interfaces, thus restoring the normal setting function of current and voltage.
Maintaining OTC welding machines by fixing common faults is crucial. Timely repairs ensure stable welding current and voltage, guaranteeing weld quality and preventing defects to enhance product reliability. Quickly resolving issues minimizes downtime, keeps production on track, and boosts efficiency. Addressing faults early prevents minor problems from escalating, reducing repair costs and extending equipment lifespan. Additionally, eliminating hazards like leakage or short circuits ensures operator safety. A reliably functioning welder helps businesses deliver high-quality products on schedule, strengthening their reputation and competitiveness in the market.
Explore the Full Guide: Industrial Robot Knowledge Hub → Repair & Troubleshooting Cluster
Explore the complete guide for troubleshooting, repair strategies, and component replacement across industrial robot systems.
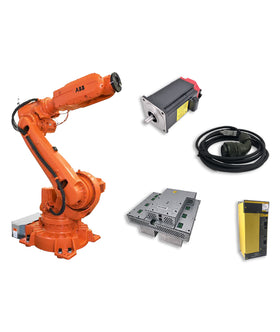
Key components commonly involved in repair guides issues and replacements.


{"one"=>"比較する2つまたは3つのアイテムを選択します", "other"=>"選択された3つのアイテムの{{ count }}"}
コメントを残す