


Industrial robot teach pendants are used daily for programming, monitoring, and troubleshooting robotic systems. Because they are handheld devices, their screens are among the most commonly damaged components in industrial robots.
A cracked or failed display can make robot operation extremely difficult—even if the controller and robot itself are still working.
This guide explains how to diagnose teach pendant screen failures, when replacement is necessary, and how to identify compatible industrial LCD displays used in major robot brands.
A robot teach pendant screen is the LCD display module integrated into the handheld controller used to operate an industrial robot.
The display provides operators with visual access to:
Most modern pendants use industrial TFT LCD panels combined with touch interfaces, similar to the displays used in industrial HMI systems.
These screens are designed to operate reliably in demanding environments such as manufacturing plants and automation cells.
Industrial robot teach pendant screens are prone to several common issues over time. Understanding both the visible symptoms and the likely causes can help you diagnose problems faster and take appropriate action.
1. Black or Blank Screen
2. Touchscreen Not Responding
3. Flickering or Distorted Display
4. Cracks or Physical Damage
5. Error Messages or Screen Freezes
Tips for Troubleshooting:
When the screen stops working, maintenance teams must decide whether to replace only the LCD module or the entire pendant.
Advantages:
If the internal electronics and cable are still working, replacing the LCD panel is often the best solution.
A full replacement may be necessary if:
Although more expensive, replacing the entire unit eliminates multiple potential failure points.
Before ordering a replacement LCD panel, verify several key details.
Robot brand and controller type
Different controllers may use different teach pendants.
Teach pendant model
The display must match the exact pendant model.
LCD panel part number
Most LCD modules include a printed model number on the back.
Touchscreen type
Ensure the replacement screen matches the original touch technology.
Accurate identification prevents compatibility problems during installation.
Industrial robot teach pendants from different manufacturers use specific LCD panels designed for long operating life and stable visibility in factory environments. When replacing a damaged display, identifying the correct LCD model is critical for compatibility.
Below are examples of LCD displays commonly used in industrial robot teach pendants.
| Robot Brand | Teach Pendant Model | Typical LCD Module |
| ABB | FlexPendant | DSQC679 LCD |
| ABB | FlexPendant | DSQC678 LCD |
| ABB | FlexPendant | DSQC652 LCD |
| FANUC | iPendant | A05B-2518 LCD |
| FANUC | iPendant | A05B-2490 LCD |
| FANUC | iPendant | A05B-2255 LCD |
| KUKA | KCP2 | KCP2 LCD display |
| KUKA | KCP4 | KCP4 LCD screen |
| KUKA | KCP4 | KCP4 SmartPAD display |
| Yaskawa | Smart Pendant | YRC1000 LCD |
| Yaskawa | Smart Pendant | DX200 LCD panel |
| Yaskawa | Teach Pendant | NX100 LCD |
| Mitsubishi | Teach Pendant | CR750 LCD |
| Mitsubishi | Teach Pendant | CR800 LCD |
| Universal Robots | Teach Pendant | UR Teach Pendant LCD |
| Epson | Teach Pendant | Epson RC LCD |
| Kawasaki | Teach Pendant | Kawasaki pendant LCD |
| Nachi | Teach Pendant | Nachi robot LCD |
| Denso | Teach Pendant | Denso pendant LCD |
| Omron | Teach Pendant | Omron robot LCD |
Because different robot generations may use different display modules, it is important to verify the exact pendant model and LCD part number before ordering a replacement screen.
Maintenance teams often confirm compatibility by checking:
Correct identification helps avoid installation problems and reduces downtime during repairs.
Many industrial robot teach pendants rely on specialized display modules designed for automation environments. To better understand the technologies behind these screens, see our guide to industrial LCD display technologies and applications.
The exact repair process depends on the robot brand, but most replacements follow a similar procedure.
Because teach pendants contain delicate internal components, repairs should be performed carefully.
Different robot manufacturers use different teach pendant designs and LCD modules. When replacing a damaged screen, it is important to consider the specific pendant model used by the robot system.
Below are examples of screen replacement considerations for major industrial robot brands.
ABB robots commonly use the FlexPendant, which integrates an industrial LCD display and resistive touch panel.
Typical issues include:
In many cases, the display module used in ABB pendants can be replaced without replacing the entire pendant unit. Technicians usually verify the LCD model, such as the DSQC series display modules, before installing a replacement screen.
FANUC robots use the well-known iPendant interface for robot programming and operation.
When the screen fails, operators may experience:
Because FANUC pendants integrate the LCD and touch interface closely, replacement often involves installing a compatible iPendant display module designed for the specific controller generation.
KUKA robots frequently use KCP2 or KCP4 SmartPAD teach pendants, both of which include industrial TFT LCD displays.
Common screen problems include:
In many repair cases, replacing the LCD display module restores the pendant without needing to replace the entire SmartPAD unit.
Yaskawa robots typically use Smart Pendants with integrated touchscreen displays.
Typical display failures include:
Because these pendants are critical for robot programming and troubleshooting, replacing the display panel is often the fastest way to restore robot operation.
The cost of replacing a robot teach pendant screen can vary depending on the robot brand, pendant model, and whether the repair involves only the LCD module or the entire pendant unit.
In many cases, replacing the display module is significantly more cost-effective than purchasing a complete teach pendant.
Typical cost factors include:
Below is a general comparison of common repair options.
| Repair Option | Typical Cost Range | Notes |
| LCD screen replacement | $100 – $600 | Most cost-effective repair |
| Touchscreen replacement | $150 – $700 | Depends on panel type |
| Complete display assembly | $400 – $1,200 | LCD + touch module |
| Full teach pendant replacement | $1,500 – $6,000+ | Highest cost option |
For many industrial robot systems, replacing only the LCD display can restore full functionality while keeping maintenance costs low.
However, if the pendant housing, internal electronics, or cable are also damaged, replacing the entire teach pendant may be necessary.
Maintenance teams often evaluate the overall condition of the device before deciding which repair option is the most practical.
Replacing the screen is usually recommended when:
In these situations, replacing the LCD display module can quickly restore the usability of the teach pendant without replacing the entire unit.
A complete pendant replacement may be required if:
Although a full replacement is more expensive, it eliminates multiple failure points in older pendants.
Because many industrial robots rely on specialized displays designed for automation environments, understanding the technologies behind these screens can help when diagnosing failures. You can learn more in our guide to industrial LCD displays technologies and applications.
Before replacing a robot teach pendant screen, maintenance technicians usually perform a quick diagnostic check to confirm whether the problem is caused by the display module or another component.
Use the checklist below to identify the most likely cause.
| Symptom | Possible Cause | Recommended Action |
| Screen completely black | Backlight failure | Replace LCD or backlight module |
| Screen cracked or leaking | Physical LCD damage | Replace LCD panel |
| Display dim or uneven | Aging backlight | Replace LCD screen |
| Touchscreen not responding | Touch panel failure | Replace touchscreen layer or LCD assembly |
| Image distorted or flickering | Loose ribbon cable | Check internal connectors |
| Display works intermittently | Cable wear or connector damage | Inspect internal wiring |
| Screen works but no touch input | Touch controller issue | Replace touch panel |
| Lines across the screen | LCD panel damage | Replace LCD module |
| Random color distortion | LCD driver fault | Replace display module |
| Screen works but freezes | Controller software issue | Restart controller and check firmware |
Performing these checks can help determine whether the display itself needs replacement or if the issue is related to internal connectors, the pendant cable, or the robot controller.
In many cases, replacing the LCD screen is the fastest and most cost-effective repair solution.
Teach pendants are frequently handled during robot programming and maintenance, which increases the risk of screen damage. Several simple practices can help extend the life of the display.
Proper handling can significantly reduce the risk of LCD failures in industrial robot systems.
Understanding how industrial displays work can also help diagnose pendant screen failures. For a deeper explanation of display technologies used in automation systems, see our guide to industrial LCD display technologies and applications.
Yes. Many teach pendant displays can be replaced individually without replacing the entire pendant.
This usually indicates a backlight failure or LCD module problem. The robot controller may still be functioning normally.
Industrial LCD panels typically last 30,000–50,000 operating hours, depending on backlight technology and usage conditions.
Yes. Replacing only the LCD panel is usually far less expensive than replacing the entire teach pendant.
Explore the Full Guide: Industrial Robot Knowledge Hub → Repair & Troubleshooting Cluster
Explore the full guide to compare options and select the right components for your industrial automation needs.
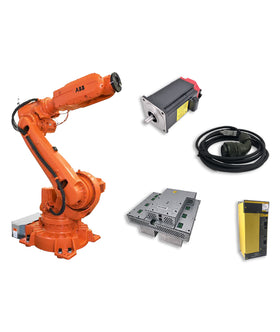
Key components commonly involved in repair guides issues and replacements.


{"one"=>"比較する2つまたは3つのアイテムを選択します", "other"=>"選択された3つのアイテムの{{ count }}"}
コメントを残す